In the second part of this blog series I will introduce you to the terrible world of touch event handlers and working around mobile Safari’s behavior issues in JavaScript. Touch events are a very sensitive feature and therefore a good knowledge about the calling stack of the default events is required. I will also refer to a snippet which will give you an idea how to create splash screens and icons for your application.
Our Goal in this Part
- A deeper look into touch events
- Create scrollable areas to extend our scroll-blocking script
- Set splash screens for various iOS devices and a start up icon
Problems and their Solutions
General and Touch Events
Why are we using touch events if we just want a single application to save notes or create a shopping list? The default links will work anyway am I right? The answer is NO. Well, not really, but every click event will delay the function call by a few hundred milliseconds (~300), which makes a good application feel slow and unresponsive. This effect remind your users of being on a website or at least a web app rather than a serious app. A little tweak to pass that issue makes a big difference in terms of user experience.
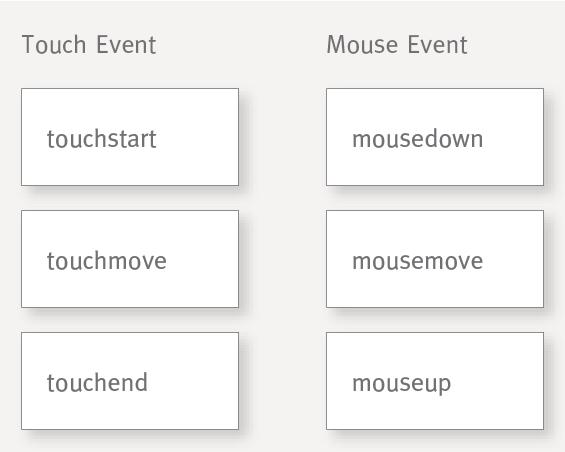
Although touch events are different than mouse events, they have something in common. You can think of them as if the mousedown corresponds to the touchstart, mousemove to the touchmove and the mouseup to the touchend event. Organizing swipe, drag, tap and other events on the same areas and elements require a good implementation. Otherwise the usability gains are more a decline.
To get all events playing perfectly with each other, you either use a library, or learn how JavaScript events really work.
Considering the capture value for our event implementations, we are able to decide which events on which elements should be prioritized. Imagine a registered swipe event for a whole page (for example document element) getting fired by scrolling in a child element. Those unwanted behaviors affect the user’s experience and can be handled with that value.
target.addEventListener(type, listener[, useCapture]);
Source: MDN
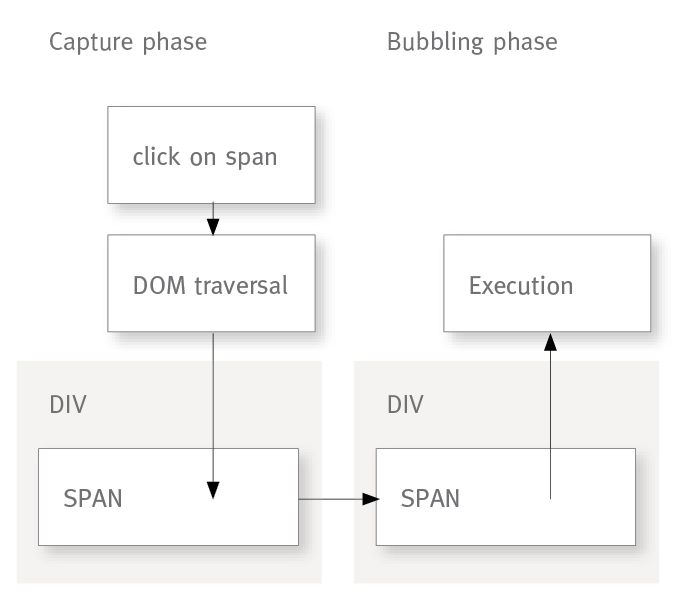
By using event capturing, the event handler of div fires first while the event handler of span fires last. When you use event bubbling, the event handler of span fires first and the event handler of div fires last. This way you are able to control your event priority. For more informations on event-phases, take a look at this link.
Another important point is the implementation in different browsers. While the default browser (Google Chrome) uses a WebKit implementation in newer Android devices, older devices do not. And still there are enough older versions around. There may be different event object structures or different function names. Those things need to be considered while developing a user-friendly app for touch devices.
When comparing native apps with web apps, you can see that a click (tap) on touchscreens behaves similar to a touchend event, for example when the user releases his finger from the screen. To avoid unwanted event executions when a user scrolls in your app, further tricks are needed. Like setting flag variables and working with timers to separate the use cases. Below I will demonstrate an implementation of a simple tap event.
With this little script we register two handy functions for registering and removing events. We will use these two functions a few times later.
var _eventHandlers = {};

var addEvent = function (node, event, handler, capture) {
	if (!(node in _eventHandlers)) {
		// _eventHandlers stores references to nodes
		_eventHandlers[node] = {};
	}
	if (!(event in _eventHandlers[node])) {
		// each entry contains another entry for each event type
		_eventHandlers[node][event] = [];
	}
	// capture reference
	_eventHandlers[node][event].push([handler, capture]);
	node.addEventListener(event, handler, capture);
}

var removeAllEvents = function (node, event) {
	if (node in _eventHandlers) {
		var handlers = _eventHandlers[node];
		if (event in handlers) {
			var eventHandlers = handlers[event];
			for (var i = eventHandlers.length; i--;) {
				var handler = eventHandlers[i];
				node.removeEventListener(event, handler[0], handler[1]);
			}
		}
	}
}
And this is a simple but yet perfectly working implementation of a tap event:
Element.prototype.onTap = function(handler, useCapture) {
	var elem = this;
	var moved = false;
	var useCapture = useCapture || false;
	var t1, t2;

	var isTouchDevice = (function () {
		return 'ontouchstart' in window // works on most browsers
			|| 'onmsgesturechange' in window; // works on ie10
	})();

	if (!isTouchDevice) {
		addEvent(elem, "click", handler, useCapture);
		return;
	}

	addEvent(elem, "touchstart", function(e) {
		console.log('touchstart');
		t1 = new Date().getTime();

		if (moved) {
        	e.preventDefault();
        }
        moved = false;
	}, useCapture);

	addEvent(elem, "touchend", function(e) {
		console.log('touchend');

		t2 = new Date().getTime();

		if ((t2 - t1) > 200) {
			moved = true;
		}

		e.preventDefault();

		if (!moved) {
			setTimeout(function() {
				handler(e, elem);
			}, 1);
		}
        moved = false;
	}, useCapture);
}
Making Areas Scrollable without having the Bounce Effect on the Entire Window
This is mostly an iOS issue. If you have ever scrolled to the end of a page and scroll even more on your iOS device, you will notice a bouncing effect making the ugly gray browser background visible.
The function below will handle a non-bounce behavior for the touchstart, touchmove and touchend event.
var nonbounce = function (elems) {
	removeAllEvents(window, 'touchstart');
	removeAllEvents(window, 'touchmove');

	var cont;
	var startY;
	var idOfContent = "";
	nonbounce_touchmoveBound = false;

	var ignore = 'a input textarea'.split(' ');

	var isContent = function (elem) {
		var id = elem.getAttribute("id");

		while (id !== idOfContent && elem.nodeName.toLowerCase() !== "body") {
			elem = elem.parentNode;
			id = elem.getAttribute("id");
		}

		return (id === idOfContent);
	};

	var isClickable = function (elem) {
		for (i in ignore)
			if (elem.nodeName.toLowerCase() === ignore[i])
				return true;
		return (elem.parentNode.nodeName.toLowerCase() !== 'body') && isClickable(elem.parentNode);
	};

	var touchstart = function (evt) {

		startY = (evt.touches) ? evt.touches[0].screenY : evt.screenY;
	};

	var touchmove = function (evt) {
		log('isClickable: ' + isClickable(evt.target))
		if (isClickable(evt.target)) {
			return; //this one is a hard one
		}

		// Prevents scrolling of all but the nonbounce element
		if (!isContent(evt.target)) {
			evt.preventDefault();
			return false;
		}
		var elem = evt.target;

		var y = (evt.touches) ? evt.touches[0].screenY : evt.screenY;

		// Prevents scrolling of content to top
		if (cont.scrollTop === 0 && startY <= y) { 			evt.preventDefault(); 		} 		// Prevents scrolling of content to bottom 		if (cont.scrollHeight - cont.offsetHeight === cont.scrollTop && startY >= y) {
			evt.preventDefault();
		}
	}

	if (typeof elems === "string") {
		cont = document.getElementById(elems);

		if (cont) {
			idOfContent = cont.getAttribute("id");
			addEvent(window, "touchstart", touchstart, false);
		}
	}

	if (!nonbounce_touchmoveBound) {
		addEvent(window, "touchmove", touchmove, false);
	}
}
The above function will make an element scrollable without having a bounce effect by calling:
nonbounce(document.getElementByID("scrollable-div"));
Defining Splash Screens and Icons
A splash screen is the first screen of your application, though it is only seen when it is added to the user’s homescreen (on iOS). I do not want to reinvent the wheel, and now I am very happy I found this link few months after adding it to my bookmarks. There you have a complete list of image sizes and examples on how to set splash screens and icons as well as other useful meta settings for various iOS devices.
Now we have our general events registered and are ready to build our application upon that base. In the next part we will start building our web application logic by constructing a simple navigation system.
If you did not read Part 1 of this series, please take a look.